Friday, August 31, 2012
Wednesday, August 29, 2012
Cooped Up, part 3--Chicken Eve
Penny: "I heard we're getting chickens tonight."
Dale: "Wow, that's great! What are chickens?"
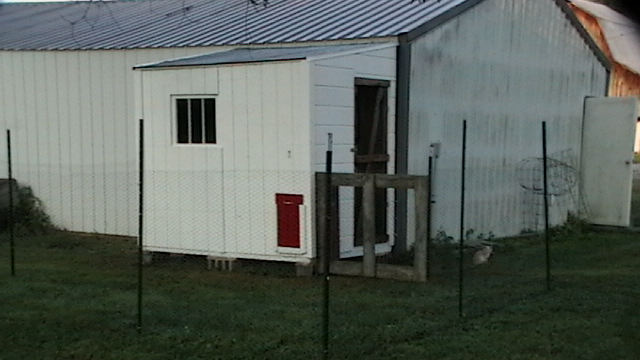
The coop is done, finished, completed. Whew!
All we had to do after the last post was:
Add the chicken door
Glaze the window glass
Caulk
Add drip edge to the roof
Put polyurethane on the door
Fence a small run
Add a gate
Add nest boxes
The chicken door is Episcopal church door red--ever notice almost every Episcopal church has a red door? I thought the coop needed some color and it was the only other outside paint I had.
We made a miscalculation on the roof (for some reason, we always have trouble with roofs) so added drip edge to cover a small gap.
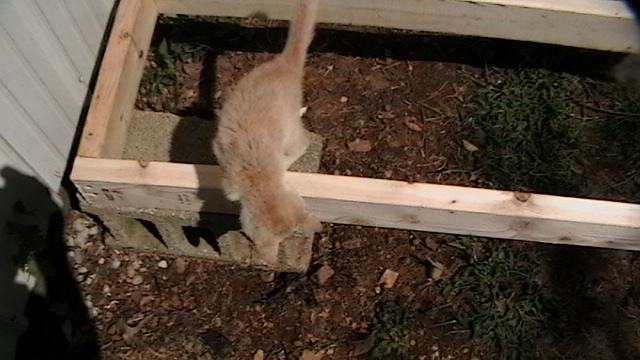
We decided to not only fence in a small run area but also fence around the base of the coop to discourage whoever might want to dig under and take up residence. We got it all secured, made sure we hadn't fenced in the cats, looked five minutes later and Penny had managed to get under somehow. Sigh.
The nest boxes are two plastic cat litter buckets I retrieved from a recycling bin. The roost is a long dowel we found in our garage.
I didn't keep track of how much the project cost, I'm guessing about $150 and a lot of sweat and sore muscles. Here's a rundown of what we bought and what we "repurposed":
- Lots of 2'x4's--we had bought about 20 on sale back in NY and brought them along, we did buy about 10 more and there were a few in the Lick Skillet garage.
- Cement blocks--found here
- 2 sheets of plywood--bought new
- 4 sheets of osb--bought new
- Primer, white paint--bought new
- Waterproofing--brought from NY
- Siding--T1-11--found here
- Metal roofing--found here
- Screws--some we had, bought more
- Roofing nails--found here
- Roofing tar--bought new
- Door--found here
- Gate--found here
- Fencing and posts--brought from NY
Our heartfelt thanks to the previous owners who left such great stuff lying around! New metal roofing and T1-11 would have easily cost another $200.
I'm picking up four layers tonight; we're more than ready to get back to fresh eggs and are sincerely hoping NOT to tackle another construction project for awhile--I'm tired!
Monday, August 27, 2012
The Ant and the Grasshopper (and the flies and...)
Friday, August 24, 2012
Cooped Up, Part 2
After we finished the walls, it was time to start the roof.
From my point of view, roofs don't make a lot of sense. Usually, the rafters are nailed into the back wall and the front ends are notched (birdmouthed) so they stick up and you have to put in soffits if you don't want an opening. We fudged this and screwed in both ends. We know this roof won't have to bear a lot of weight so are (mostly) confident it will hold.
There's no getting around the fact that to put on a roof, someone has to climb onto the roof. In our case, that would be me. We hoisted up 2 panels of osb, secured the corners from the ground and then up I went. I love the view from up there.
We added furring strips (found in the garage), and then metal roofing (also found).
To cover the walls we did some serious salvage.
Remember the shed at the beginning of the project?
The original floor was reinforced with T1-11 panels--2 full 4'x8' and several partial pieces. It took hours and some sore muscles, but eventually we pryed them up. Even with that we still needed a few more pieces; Tom suggested the dog house that came with the place. We have no plans to get a dog, so
One deconstructed dog house later, we gained just enough T1-11 to finish the siding.
Next time: chicken door, painting, fencing.
Saturday, August 18, 2012
It's a good thing I'm retired.
Every project we start takes twice as long as it should to finish (and costs twice as much, but that’s a thread for another time).
Here’s how a typical chicken coop construction day runs.
Tom and I have different internal clocks, so by the time we both get up and are ready to tackle building, it’s almost 9:00. We’re almost out the door when I remember we’re out of bread and I was going to bake some today. So I throw together the dough, knead it, and set it to rise. This gives us one hour to work uninterrupted.
We grab work hats and gloves—and the kitchen timer—and set off for the garage to cut wood. Oops, where’s the tape measure? Back into the house, find the tape measure, stop to pet the cat, back to the garage. Can’t see the markings from this pencil, where’s the marker? Back into the house, find the blue marker, stop to pet the other cat, back to the garage.
Somehow, we finally manage to get all pieces for the east wall cut and only one of them is measured wrong. Lay them out and get some screws in. The timer rings. Back into the house to punch down the bread dough and shape it into loaves; we have 45 minutes this time.
A few more pieces attached. The phone rings. It’s a dear, and chatty, friend of Tom’s. Thirty minutes later, he’s back working.
Most of the wall is assembled except for figuring out where the window will go. We discover we’re running out of screws. And nails. The timer rings; inside to bake the bread which gives us another 35 minutes.
We work on the window. The bread is done and it’s lunchtime.
We decide a run into town is necessary. Town is 11 miles away so this will take an hour or two. And every trip must be for multiple errands to justify the time and gas. So we clean up and head towards Salem—bank, lumber yard, grocery store.
Back home and into work clothes again. We finish the wall! Well, kind of. I realize later that we’ve forgotten the support under the window but that can be added. The forecast calls for rain so we cover our creation with tarps and rocks and wrap up another more or less productive day of building.
It’s a good thing I’m retired; I can't imagine how long this would take if we only had weekends.
Wednesday, August 15, 2012
Cooped Up, Part 1
At first we thought we could fix up this shed for a chicken coop. A realistic look at the work involved caused us to chicken out of that idea.
So we hit the lumber store and started building. For the record, even though this is the 6th shed we’ve constructed, we’re still making mistakes and figuring it out as we go.
First we scrounged cement blocks from around the property. We did our level best to get them even but still had to reset them later (I know, in a frost area they should be dug in. But we've never had a problem with heave and the chickens won't mind if their home is slightly tilted). The coop is 8’ by 6’ so we could square the corners using our old geometry friend the 3-4-5 right triangle (Kids! Math does come in handy).
We used 2x4’s for the floor base. If the structure was going to be any larger we would have gone for 2x6’s and hanger joists. Everything is screwed together; thank heavens for screw guns!
We did have some help along the way.
At first we used ½” plywood for the flooring. The voice of experience should have told us that wasn’t thick enough and sure enough, the floor bounced. So we added an underlayment of osb and the floor will now support the heaviest chickens we can raise. We also waterproofed the ply and beams.
This was going to be a lean-to type shed using the wall of the garage as a back wall. But the garage siding is ribbed and we couldn’t see a good way to close any gaps left. And having a healthy regard for possible tornadoes, we decided to make a back wall and bolt it to the garage. More 2x4’s to frame the wall and we sided it with any and every scrap of osb and ply we could find laying around, then painted it.
We weren’t sure we could lift it up into place, 2 senior citizens with bad knees and backs, but with a bit of grunting we got it up. It’s nailed into the floor and temporarily braced at the sides.
There is no rain in the forecast so today we’re giving our bodies a break. We do plan to pull some metal roofing out of the weeds, flatten it, and see if we have enough for the roof. And that broken down shed has an inner screen door we think will work plus an extra window (even chickens deserve a window). We’re still considering siding so we’ll make some calls today and see what we can rustle up.
Tuesday, August 7, 2012
Sunday, August 5, 2012
Kneejerks
In many ways, Lick Skillet is a step up from Woodchuck Acres.
The house is bigger, there is a three car garage (our first functional garage in 40+ years of marriage), we have 3 acres instead of 2, the land is soil instead of rocks, we’re in hardiness zone 6 instead of 5.
But stepping up comes at a price.
We lived at WA for 10 years. That was 10 years in a one story house at ground level. Even though the terrain was hilly, my legs forgot what it was like to climb stairs.
Our Indiana home not only has a second story reached by 13 steps but each entrance requires clambering up 3 steps also.
I thought this would constitute great exercise but my knees have rebelled. I am now lurching awkwardly downward every time I go outside and avoiding the upstairs all together. And I am shopping for cheap knee braces. If it gets much worse I will be crawling up and down.
In old age we return to childhood, as Shakespeare said,
“That ends this strange eventful history,
Is second childishness and mere oblivion,
Sans teeth, sans eyes, sans taste, sans everything.”
Is second childishness and mere oblivion,
Sans teeth, sans eyes, sans taste, sans everything.”
And I would add, sans knees.
For now, I’m managing but starting to walk stiff-legged like a zombie, at least I haven’t developed a taste for human flesh.
Thursday, August 2, 2012
All mulches are not created equal
Part of moving into a new place is undoing what the previous owners did.
Take the foundation plantings for instance.
If you like stone mulch, they did it right. Layers and layers (and layers) of gravel on top of landscaping cloth. The beds were pretty much overgrown when we moved in but some lavender and colepsis were hanging in there and I uncovered a clematis drowning in trumpet vine.
However, I don’t like stone mulch. It adds nothing to the soil, always spills out into the lawn, and makes new plantings difficult.
New plantings like the herbs I want around the house.
Have you ever tried to clear up tons of gravel in 90+ degree heat? We’re working on it a small section at a time, not quite half done. Mint, sage, chives, oregano, horehound, and lemon balm that we brought with us have been transplanted and are doing well.
Straw may not be as neat as gravel, but it holds moisture well and breaks down to add lots of organic matter to the soil.
Being dedicated recyclers, we have found a use for all of that gravel--the driveway is looking pretty spiffy.
Subscribe to:
Comments (Atom)


.jpg)


