Showing posts with label construction. Show all posts

Monday, June 22, 2020

Times of Extreme Frugality Redux

Narrator: When last we visited Times of Extreme Frugality, Tom and Cindy had recouped their finances to levels last seen prior to the Great Car Incident. Now they are ready to embark on another frugal adventure, this one intentional...


We find ourselves in great shape financially, for a change. Reduced spending due to the pandemic,  a job with the Census, and the stimulus checks means we are less poor than we have been in a while.

Can't let all of that money sit around. We decided to help the local economy, so...

We are getting a garage!


Ours won't be quite this big.


A garage should be a good investment for us. It will also, of course, eat up most of the money we just accumulated since last year. 

2020 (in addition to it's many other colorful attributes) will now be known in the Rasely household as:

"Times of Extreme Frugality Redux"


Stay tuned for more cheap fun, hacks, and, invariably, fails.

Friday, June 14, 2013

Bankruptcy Barn


Well, not quite that bad, but you know the old joke:

Q. How do you make a small fortune in the country?
A. Start with a large one.

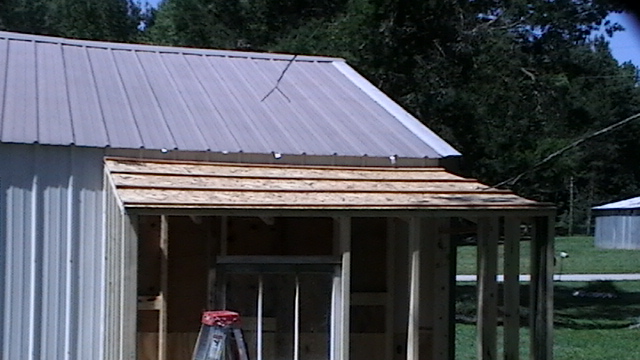
My thinking, grounded in the economic realities of around 1958, said it can't possible cost that much to build a 10'x15' pole barn if we do it ourselves.

I stopped keeping track of actual costs after about the 5th trip to the lumber yard but all in all this small construction project took at least $850 out of our checkbook even though we applied every frugal trick we have learned in 41 years of living la dolce vita on a budget.

And then we had to fork over the money for


Ivy and Maisie (the ram should be here early July).

We've resolved to put large construction projects and animal acquisitions on hold for now. I think with the garden gone to weed, the pasture overgrown, the large pile of scrap metal in the driveway to dispose of, fire ring to rebuild, firewood to cut, grandkids coming to visit (!!!), and some musical projects of Tom's coming up, we can manage to keep busy and at the same time give the finances a chance to rebloom.

Remind me of that resolution if I start talking pigs. 

Friday, March 29, 2013

Tar without feathers


Last weekend I spent part a sunny spring day trying not to be covered in tar.

The roof of our new chicken coop, see Chicken Coop, leaks (I may  have mentioned that building roofs is not our strong point). We might have to redo the metal panels but decided to try covering the nails and seams with yet more roofing tar first.

I climbed up onto the roof and wielded the putty knife with as much precision as possible, which is to say, not very precisely at all.What is it about this stuff? No matter how careful you are, it gets everywhere you don't want it to. At least this time I didn't end up sitting in a glop of tar.

Tar is useful, if smelly, stuff. Pine tar is good not only on bats but can be put on wounds on animals--on chickens it will keep other birds from pecking at the sores (but it also sticks to feathers and coats and fingers--I've switched to Bluekote which also stains but at least it isn't sticky).

And everytime I use tar, I come away thinking of the LaBrea Tar Pit or Brer Rabbit. I'm hoping this dinosaur won't need the stuff again anytime soon.

Tuesday, February 19, 2013

Our Port in a Storm

Previously on the "Closet Project"...


The drywall was up. Next step--the door.

Holy moly! The price of solid doors is over the moon. Our nearest Habitat ReStore had a wide selection of hollowcore doors but, since this is our storm shelter, we felt those wouldn't do.

We put on our how-can-we-do-this-reasonably thinking caps and decided the door to the office closet could be sacrificed. Voila!, sturdy door.


I spackled and taped, primed and painted. Then it was time for another trip to the lumber store for the bookshelf supplies.

Among other things, we needed twelve 1"x8"x8' boards. We started at Home Depot. We should know better by now; we inspected the entire stack of boards and not one, not even one, was straight. So the next day we visited the True Value up the road and finished the lumber purchase (side note: insert second Holy Moly here for price of lumber).


February construction and an unheated garage=staining and cutting inside. Several headaches and messes later, we had the material prepped.


Got the framework up,


Signed on the back for posterity,


Added the adjustable shelves (made adjustable by drilling a gazillion, tedious, little holes) and the contents from four small bookcases. Ta da!

Well, almost ta da; we still need to add trim and one more shelf.

The entire project--wall and bookcase--cost about $350* more hours than I bothered to keep track of, and quite a few sore muscles.

My idea of a fun time!!


* the refund from the generator, see  Buyer Beware --yes, it was finally resolved!

Thursday, January 31, 2013

Closeted


Hack! Snort! Achoo!

Winter is the time for indoor projects. Unfortunately, it is also the time for colds and flu. I get a cold about once every 5 years and when I do, it's a doozy.

But I rallied from the sick bed and we got the door wall of the closet built and installed.


"Built and installed". Another simple statement that does nothing to convey the sore knees from putting in screws while on the floor or the joy of hitting the frame with a sledghammer because an old house is uneven and measurements don't equal reality.

But, yes, the door frame is built and definitely installed.

Next day, since we have always shared everything, Tom came down with the bug. So that was a construction day lost to the couch.

The day after that, he figured he may as well get something done while feeling poorly, so we put up the final wall.


And wallboarded the outside.


I  hate wallboard. The 4' x 8' sheets are too big to handle easily, it breaks if you give it a dirty look, and it's a pain to cut. Seems about time someone invented a good alternative but I haven't heard of one. At least we have walls, however rough they look.

We're not rushing with the next step (the final goal is to finish this wall off with trim and build bookcases along the big, blank area. We'll be moving a solid wood door from another room for the doorway.) We're just going to enjoy not having construction materials and tools all over the living room for a week or so.

And maybe finally get over these colds.

Thursday, January 24, 2013

In the Closet


We're closet preppers.

In our case, quite literally.

When you mention southern Indiana, New Yorkers usually respond with "Oh, that's tornado country." It came as a surprise when I was looking at properties in this area that few had basements. The place we bought not only has no basement but doesn't even have an interior room.

We looked at the ugly, open stairway and decided that enclosing it would not only give us space for lots and lots of bookshelves, enable us to seal off the upstairs to save on heat, and we could also expand and reinforce the under-the-stairs closet for a storm shelter.


Open stairway with construction materials at the ready!


January is the perfect time for an indoor project so we drew up plans and made a pricey trip to the hardware store.

I thought we would start with an 8' section but my saner half reminded me that we were indeed capable of building something we couldn't lift. We built two 4' sections instead.


For strength we put in double beams and in one case (my mistake in measuring) a triple beam.

As with any project, problems arise. In this case, an outlet that was in the floor and had very little play in the wire to move it.


We pondered and jiggled and tugged and cursed and finally got it to the point where we could work it through the wall.

In the middle of the first day of construction, I discovered I was coming down with what seemed suspiciously like the flu. We knocked off for two days while I sneezed and coughed and moaned around on the couch. Today I dragged myself off of my sick bed and we put up the drywall for this section.


 "Put up the drywall". Sounds easy, right? Let's just say, you are very glad you weren't here. Nuff said.

Working inside during winter means you store your materials inside, so everytime we start and finish for the day we end up moving 2"x4"s and sheets of drywall. That in itself is almost as much trouble as the actual work.


Next, we start the extension part, but not until I'm fully recovered 'cause it ain't no fun trying to run a screwgun while you're sneezing your head off.

Thursday, November 29, 2012

Home is where the cookies are

The best thing about our new Lick Skillet kitchen was the curtains, which the sellers had generously left behind.


A Rasely make-over was indicated; that meant more shelving, a warmer color, more shelving, propane stove, more shelving, a new light and faucet, and did I mention more shelving?

Here's the kitchen in the real estate ad:

We did the simple things first. Replaced the leaky faucet: expensive (everything was so corroded we had to get a plumber in) but easy. Moved the too large and old fridge out to the garage and brought in our smaller one from New York and we placed it on the same wall as the stove.

The light over the sink was florescent and didn't work right. It was one of those "simple" jobs that took all afternoon and left us both with aches and pains but we did get it done.

We had new gas lines run and installed our small, basic propane stove; I much prefer the control you have with a gas stove.

The walls were white and badly in need of a paint job. I decided to go with a creamy white--helping me look forward to the day we get goats again and have rich, fresh milk! In addition to painting the walls, I also painted the cabinets and added handles,


painted the shelves we built,


and the freestanding cabinet we found in the garage, plus the in-wall shelf. 


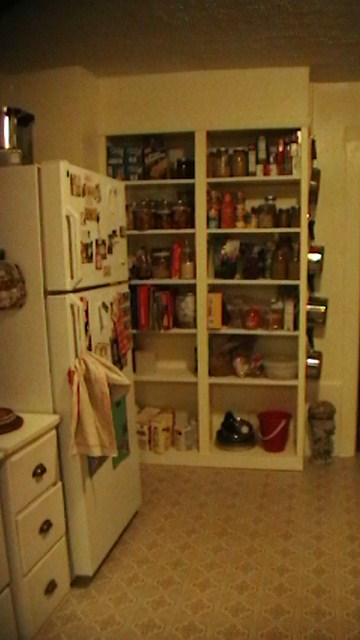
At Woodchuck Acres, we had a separate pantry, here all the shelves are in the kitchen so I can see at a glance what stores I have at hand.

I'd still like to replace the table with a rectangular farm table and do something about the floor. But we're happy with the changes and it feels more like home--complete with cookies in the cookie jar.


Saturday, September 8, 2012

What's Old is New


Table made from recycled teak, from www.exbali.com
 Recycling is the rage.

Bloggers boast about turning old dog chains into jewelry, vintage oars into scarf racks. Glossy magazine articles feature crafters who repurpose bed frames into benches, plastic framed mirrors into chalkboards. The end products always take your breath away with the artistry.

I needed a plant table. Tom took 6 pieces of 2'x4' and a ratty, wormy piece leftover from the doghouse we demolished, and voila!, a work table.


We've been reusing and recycling our entire lives but this creation, although functional, is never going to make the cover of Dumpster Delights*. I'm betting it will hold plants just as well as teak, though.


Tom showing pride in his work.

*There MUST be a magazine by that name!

Wednesday, August 29, 2012

Cooped Up, part 3--Chicken Eve

Penny: "I heard we're getting chickens tonight."
Dale: "Wow, that's great! What are chickens?"


The coop is done, finished, completed. Whew!


All we had to do after the last post was:
    
     Add the chicken door
     Glaze the window glass
     Caulk
     Add drip edge to the roof
     Put polyurethane on the door
     Fence a small run
     Add a gate
     Add nest boxes

The chicken door is Episcopal church door red--ever notice almost every Episcopal church has a red door? I thought the coop needed some color and it was the only other outside paint I had.

We made a miscalculation on the roof (for some reason, we always have trouble with roofs) so added drip edge to cover a small gap.

We decided to not only fence in a small run area but also fence around the base of the coop to discourage whoever might want to dig under and take up residence. We got it all secured, made sure we hadn't fenced in the cats, looked five minutes later and Penny had managed to get under somehow. Sigh.

The nest boxes are two plastic cat litter buckets I retrieved from a recycling bin. The roost is a long dowel we found in our garage.


I didn't keep track of how much the project cost, I'm guessing about $150 and a lot of sweat and sore muscles. Here's a rundown of what we bought and what we "repurposed":

  • Lots of 2'x4's--we had bought about 20 on sale back in NY and brought them along, we did buy about 10 more and there were a few in the Lick Skillet garage.
  • Cement blocks--found here
  • 2 sheets of plywood--bought new
  • 4 sheets of osb--bought new
  • Primer, white paint--bought new
  • Waterproofing--brought from NY
  • Siding--T1-11--found here
  • Metal roofing--found here
  • Screws--some we had, bought more
  • Roofing nails--found here
  • Roofing tar--bought new
  • Door--found here
  • Gate--found here
  • Fencing and posts--brought from NY

Our heartfelt thanks to the previous owners who left such great stuff lying around! New metal roofing and T1-11 would have easily cost another $200.

I'm picking up four layers tonight; we're more than ready to get back to fresh eggs and are sincerely hoping NOT to tackle another construction project for awhile--I'm tired!

Friday, August 24, 2012

Cooped Up, Part 2


After we finished the walls, it was time to start the roof.

From my point of view, roofs don't make a lot of sense. Usually, the rafters are nailed into the back wall and the front ends are notched (birdmouthed) so they stick up and you have to put in soffits if you don't want an opening. We fudged this and screwed in both ends. We know this roof won't have to bear a lot of weight so are (mostly) confident it will hold.


There's no getting around the fact that to put on a roof, someone has to climb onto the roof. In our case, that would be me. We hoisted up 2 panels of osb, secured the corners from the ground and then up I went. I love the view from up there.


We added furring strips (found in the garage), and then metal roofing (also found).
To cover the walls we did some serious salvage.
Remember the shed at the beginning of the project?


The original floor was reinforced with T1-11 panels--2 full 4'x8' and several partial pieces. It took hours and some sore muscles, but eventually we pryed them up. Even with that we still needed a few more pieces; Tom suggested the dog house that came with the place. We have no plans to get a dog, so


One deconstructed dog house later, we gained just enough T1-11 to finish the siding.


Next time: chicken door, painting, fencing.